Cristina Gonzalez
  • THIS IS ME
  • 20 Moments of Tooth
  • BLOG
  • Family Life
    • Homeschool >
      • Organization
      • Year 0
      • Year 1
      • Year 2
  • Contact
    • About Me
  • Etsy Shop
  • Amazon Favorites

How to Make Homemade Playdough

5/27/2020

0 Comments


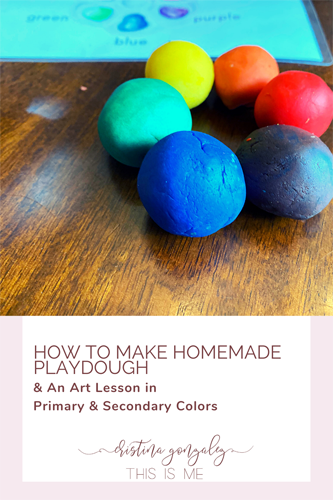
And an Art Lesson on Primary & Secondary Colors too!

How to make homemade playdough
Do your kids faces light up when you mention play dough? Mine 100% do! The joy of playing with it still feels new to them because I don't really allow them to play with it anytime they want.  

Man, typing that out makes me feel like a tyrant over the play dough.

The truth is that for a long time I had a list of "Hard No's" in my house.  Play dough and Slime were always tied for first place because I just couldn't handle the mess and pickup afterwards.  (Thank goodness I found out that vinegar helps to clean up slime! Hot water and cloth towel pickup play dough just fine.) 

I still struggle with it, but by making it part of our school time I've been able to make a mental switch.  I actually look forward to playing with play dough now with my kiddos. 
Picture
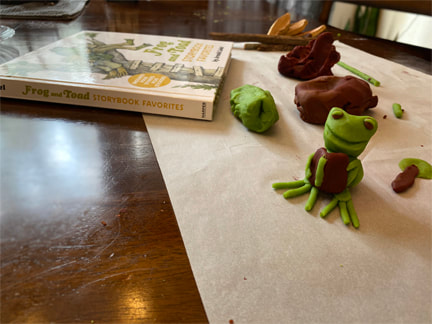
Reading aloud from Frog & Toad and playing with play dough has especially become a likely duo around here.

Making your own play dough and getting the kids involved is a fun project afternoon project.  Since we had to dye the dough, I decided to make one of our play dough dates into an art lesson on what primary and secondary colors are. There's nothing like play creation to really help drive ideas into memory.

Here's a video on how the process of making the play dough went for us. 
​Ingredients and Steps are below:

Homemade Play Dough Recipe

Ingredients:

1 cup flour
1/3 cup salt
2 tsp cream of tartar
1 T oil
1 cup water
gel food coloring

Steps:

1.  In a seperate bowl, gently whisk all the ingredients together. Reserve the gel food coloring for last.

2.  Pour carefully into pan and stir. Stir until the mixture thickens and dries.

3.  Once dough is not wet, take off of stove until non-stick surface.

4.  Knead until cool.

5.  Divide dough and and a drop or two to each ball and knead until well incorporated

6.  Store in an airtight container..

Tips & Tricks

1.  Salt & Cream of Tartar both act as preservatives & help aid in elasticity of the dough. Keep in mind, however, that this dough will go bad if it is not refrigerated. It keeps longest if kept in a plastic baggie with as much air taken out as possible to create a semi vaccuum.  

2.  If you're play dough gets a bit tough/hard, add one drop of water at a time and kneading the dough.  Also, you can try wrapping the dough in a moist towel and heating it for a few seconds in the microwave. (3-5 seconds should suffice.)

3.  To substitute gel food coloring, one can add in natural coloring such as beet juice, spinach juice, carrot juice, etc. Just measure out the amount of colored juice you're using and take out that amount of water in the recipe.  For richly pigmented naturally dyed dough, use one full cup of naturally dyed juice and take out the water in the original recipe.  Depending on the viscosity of the juice you may need to cook the dough a little longer.   

My favorite tools 

This post may include affiliate links. If you click and make a purchase based on my recommendation, I get a small remuneration at no extra expense to you. I only recommend things I actually use and believe to be a blessing.
Below are some of the items I absolutely love using and have on hand to make this recipe a cinch. 
I use Americolor gel food coloring for cake decorating and sugar too, because typically a few drops is all you need to get bright colors.  (Be careful when you let the kids put in the gel dye drops, they usually squeeze a little too hard allowing way more gel to squeeze out than you need.)
Every home needs mixing bowls with silicone grips at the bottom, especially if you're home has kids that love to help you mix things up, like play dough, pancake mix, brownies, etc. The fact that these have lids make them indispensable. 
Nice big crystals that can be used in cooking as well. This is the salt we used back in cooking school and thus I've continute used this and  pink himalayan salt for sprinkling atop of food in our home. The Kosher salt is an inexpensive alternative to use for projects such as these.
High heat resistance silicone spatulas are used daily around here.  I've had enough plastic spatulas melt around here to only use these day in and day out.
If you have little ones that do better with images or photos to help them read through recipes, I invite you to print my free Homemade Play Dough Recipe Printable below.  I added small images of the measurement size and a small image of ingredient to help the littles follow along. Enjoy!
Picture
Picture
Get your free playdough recipe by subscribing to our newsletter.
Count Me In!
0 Comments


Leave a Reply.

    Picture

    Meet Cristi

    Mom of three beautiful kids, married to my best friend, finding daily ways to bring joy! 

    Archives

    February 2023
    September 2021
    August 2021
    July 2021
    June 2021
    May 2021
    April 2021
    March 2021
    November 2020
    August 2020
    July 2020
    June 2020
    May 2020

    Picture

    Categories

    All
    Afterschool
    Books & Curriculum
    Evaluation Portfolio
    Exams
    Gardening
    Handicrafts
    Homeschool
    Homeschool Day-in-the-Life
    Homeschool Organization
    Instant Downloads On Etsy
    Kindergarten
    Letter Of Intent
    Montessori
    Morning Time / Basket
    Narration
    Nature Study
    Preschool
    Year 0
    Year 1
    Year 2

    RSS Feed

This Is Me Cristi

Follow Our Journey

Access my freebies here!

    This Here Newsletter

    Subscribe to receive my latest videos, free printables, and insider news right to your inbox!

Subscribe!
About Me
Contact
Privacy Policy
  • THIS IS ME
  • 20 Moments of Tooth
  • BLOG
  • Family Life
    • Homeschool >
      • Organization
      • Year 0
      • Year 1
      • Year 2
  • Contact
    • About Me
  • Etsy Shop
  • Amazon Favorites